
If you are a student and want to set up a study really quickly without doing any further coding, you can do that. Here we use the popular SART code to do so.
STEP 1
First, make sure you have a PsyToolkit account. If you do not have one, just register a new account.
Register: Go here to register for a new account
Login: Register: Go here to login to existing account
STEP 2
Choose an experiment you want. You can have a look at all experiments that are there on the experiment library:
There are different ways to get it, here is one way:
-
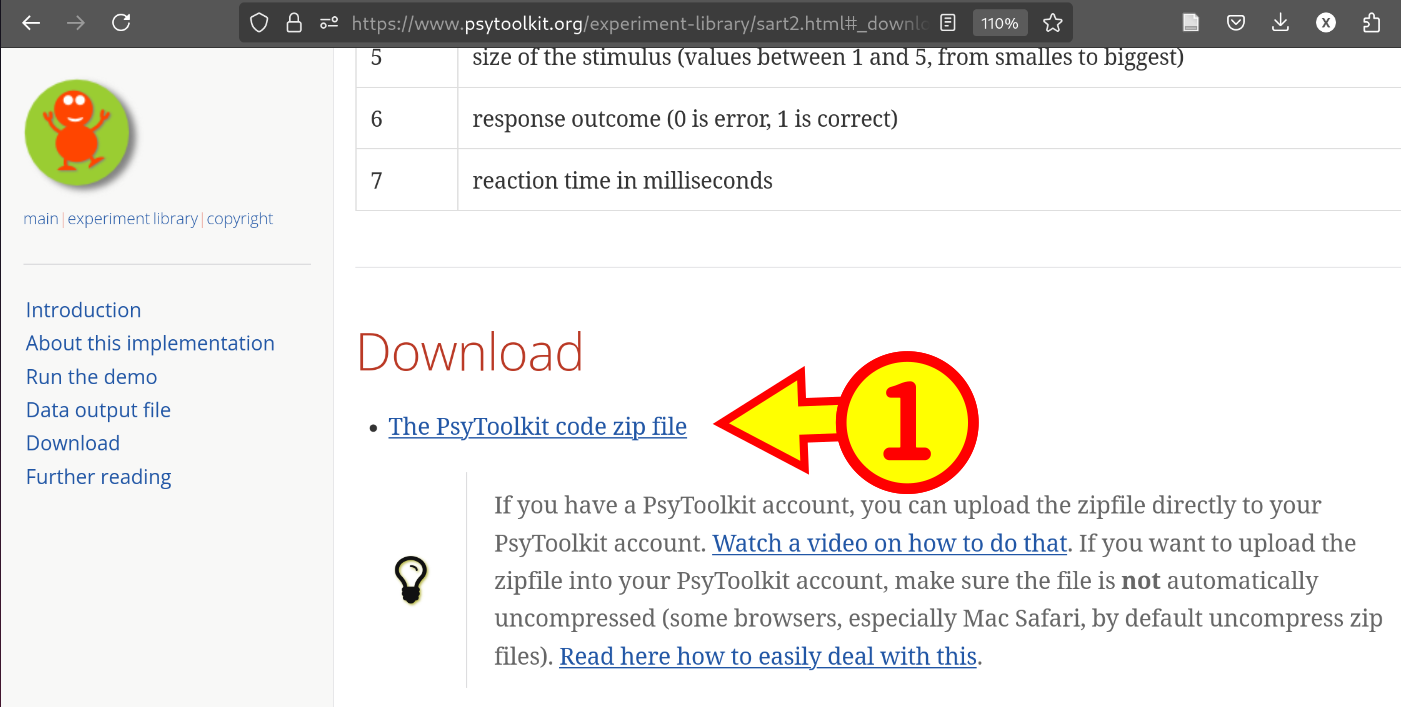
Go to your experiment
-
Find the "Download section" in that page
-
Click on the link "The PsyToolkit code zip file".
-
Make sure not to open the zip file, the browser will just store it on your local computer/laptop
Now that is all for downloading, go to the next step where you will use this
STEP 3
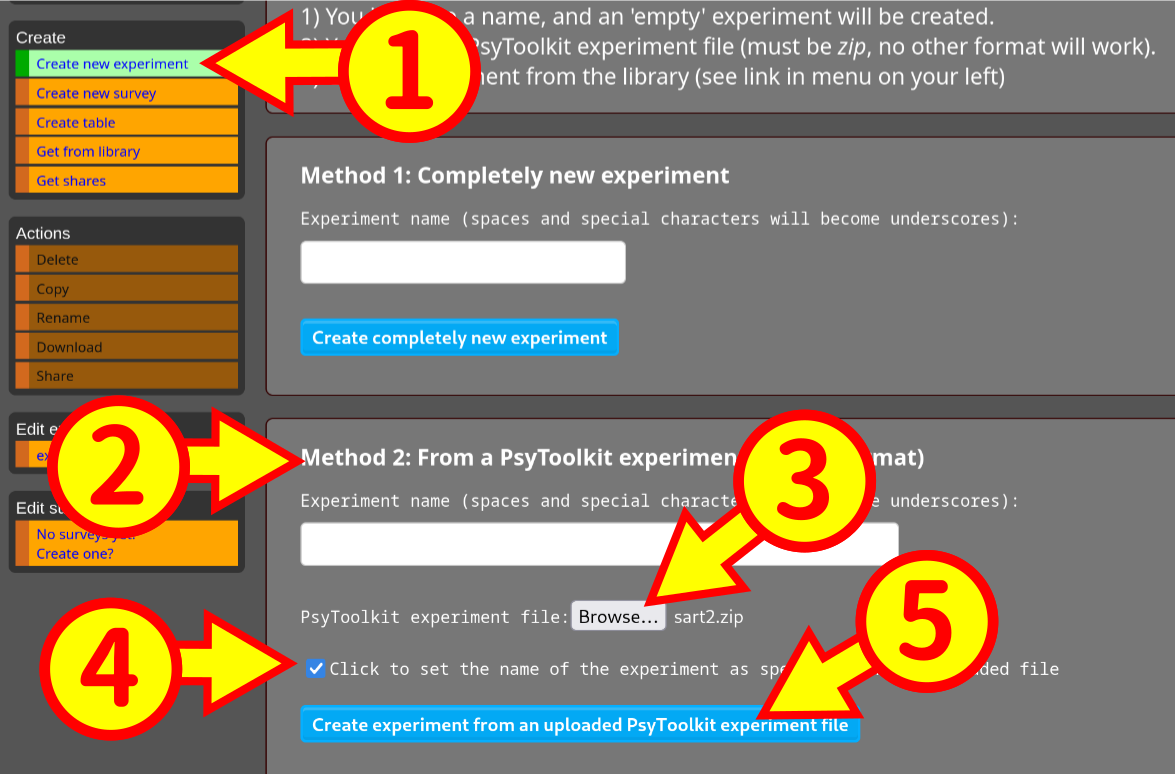
Now in your PsyToolkit account, click, "create a new experiment".
If you click there, select "Method 2: From a PsyToolkit experiment file (zip format)"
You do not need to choose a name, but you can or you can click to take the name from the experiment.
Then click the blue button "Create experiment from an uploaded PsyToolkit experiment file"
Congratulations, you now have the experiment in your PsyToolkit account.
STEP 4
Now you are ready to "embed" your newly uploaded experiment into a survey. Creating a new survey is super simple.
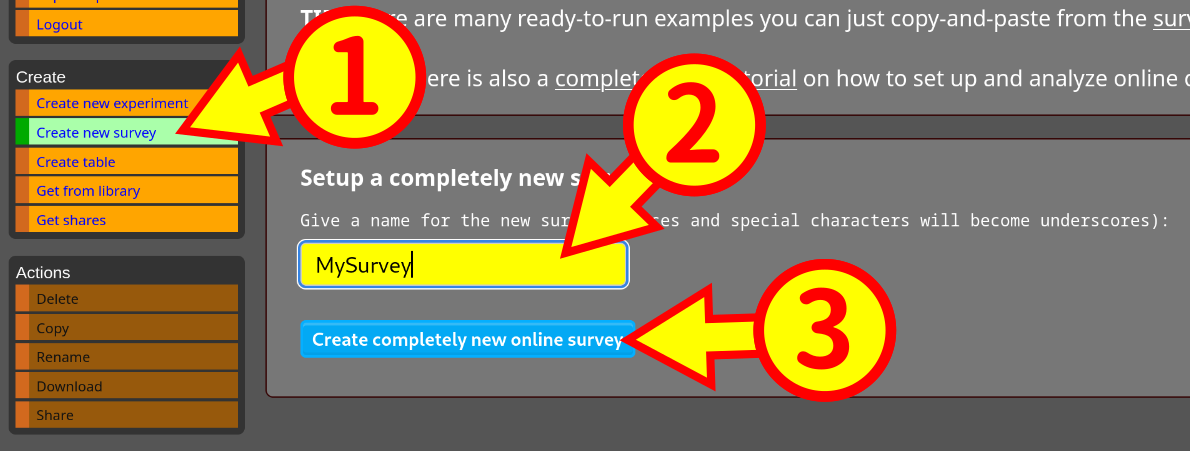
First you want to click on "Create new survey" which is on the top left of the page. Think of a name, call it whatever you like.
| Once it is created, you will go automatically to the window. If you later want to edit it, you need to select it form "Edit surveys on the left". |
STEP 5
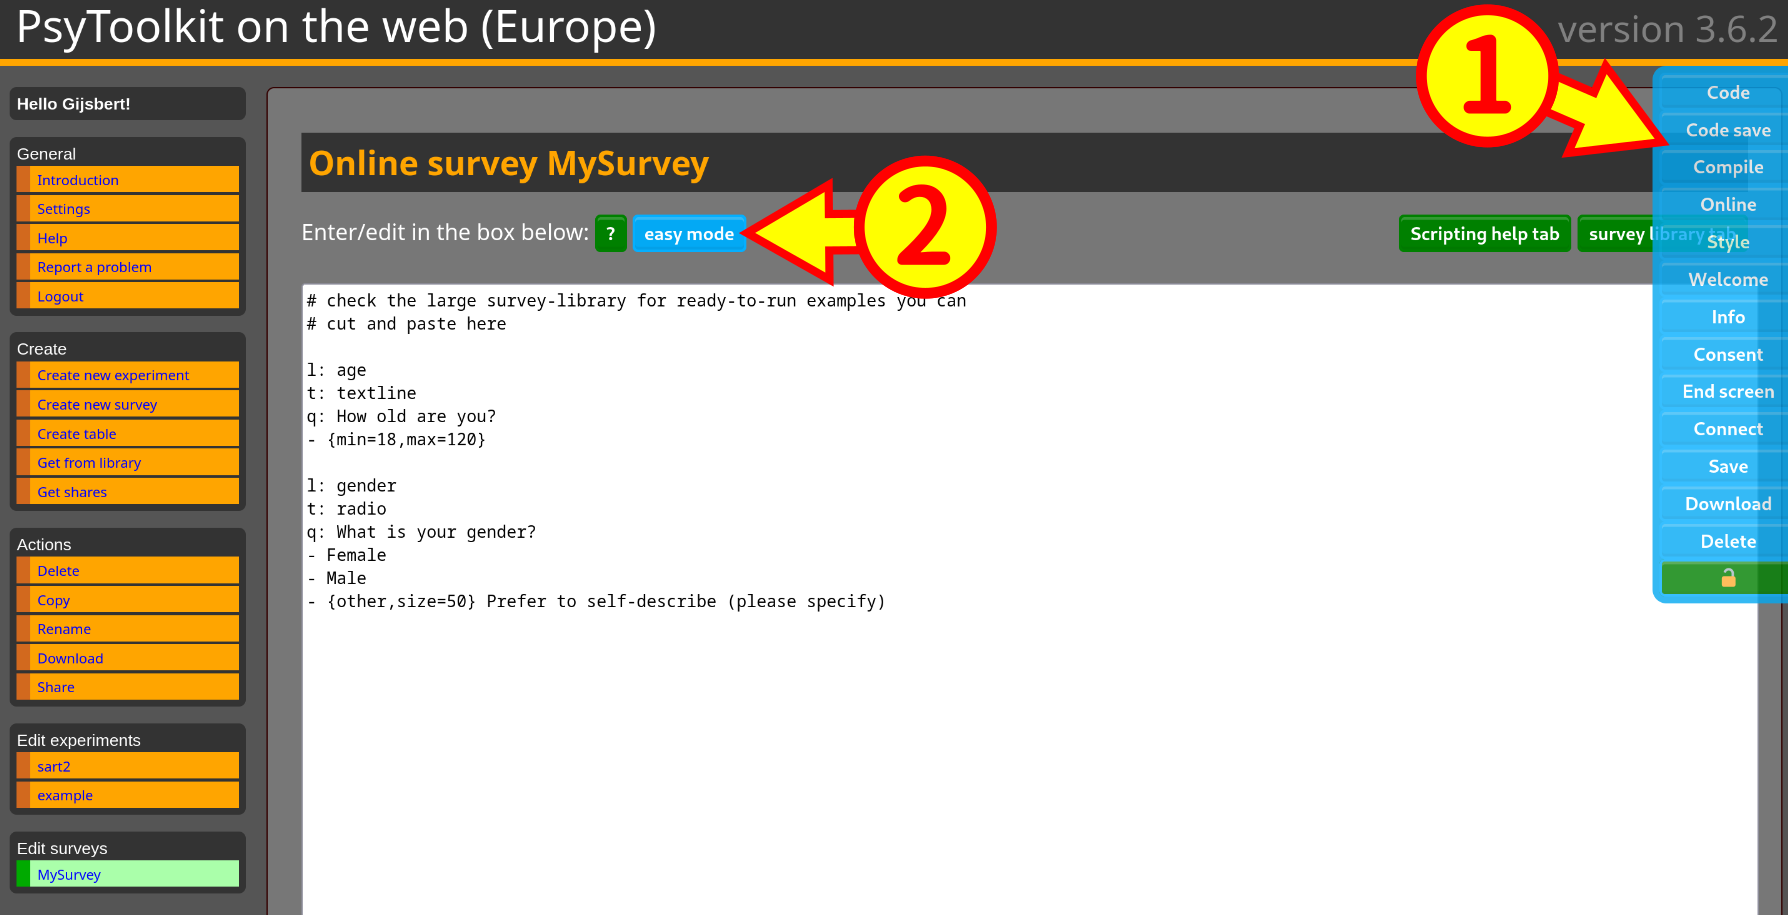
We suggest to move your mouse to the right side of the browser window and "lock" the popup menu there, that makes it a bit easier (1).
Now we are going to add the experiment you earlier made to your new survey.
Click on "Easy mode" to edit the survey code more easily (2)
| There are lots of things you can set in the survey. But for it to work, you can leave almost all as it is. For now, just try to get it to work first. |
STEP 6
Now you you get a list of the "questions" you already have in your questionnaire, namely age and gender. All we need to do now is add the experiment.
We select the "+" symbol of the last question, because you want to add the question after the question "gender".

STEP 7
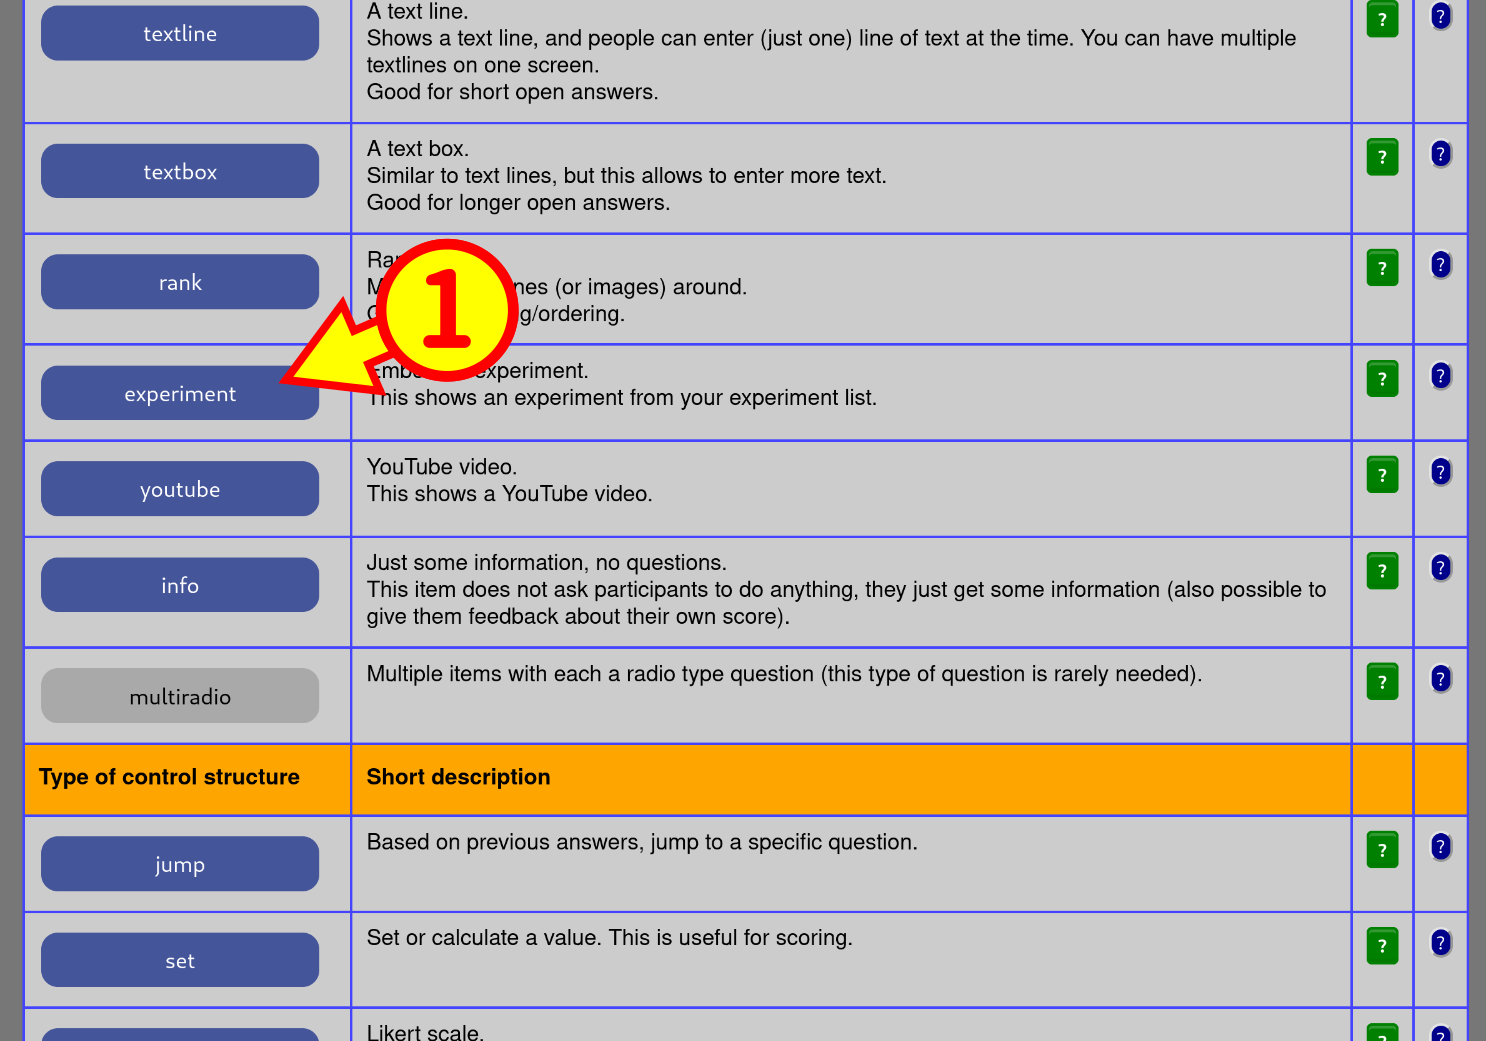
Now you get a list of all the types of "questions" you can enter. We select the experiment. This is not really a "question", but it is a whole experiment. Anyway,click this.
STEP 8
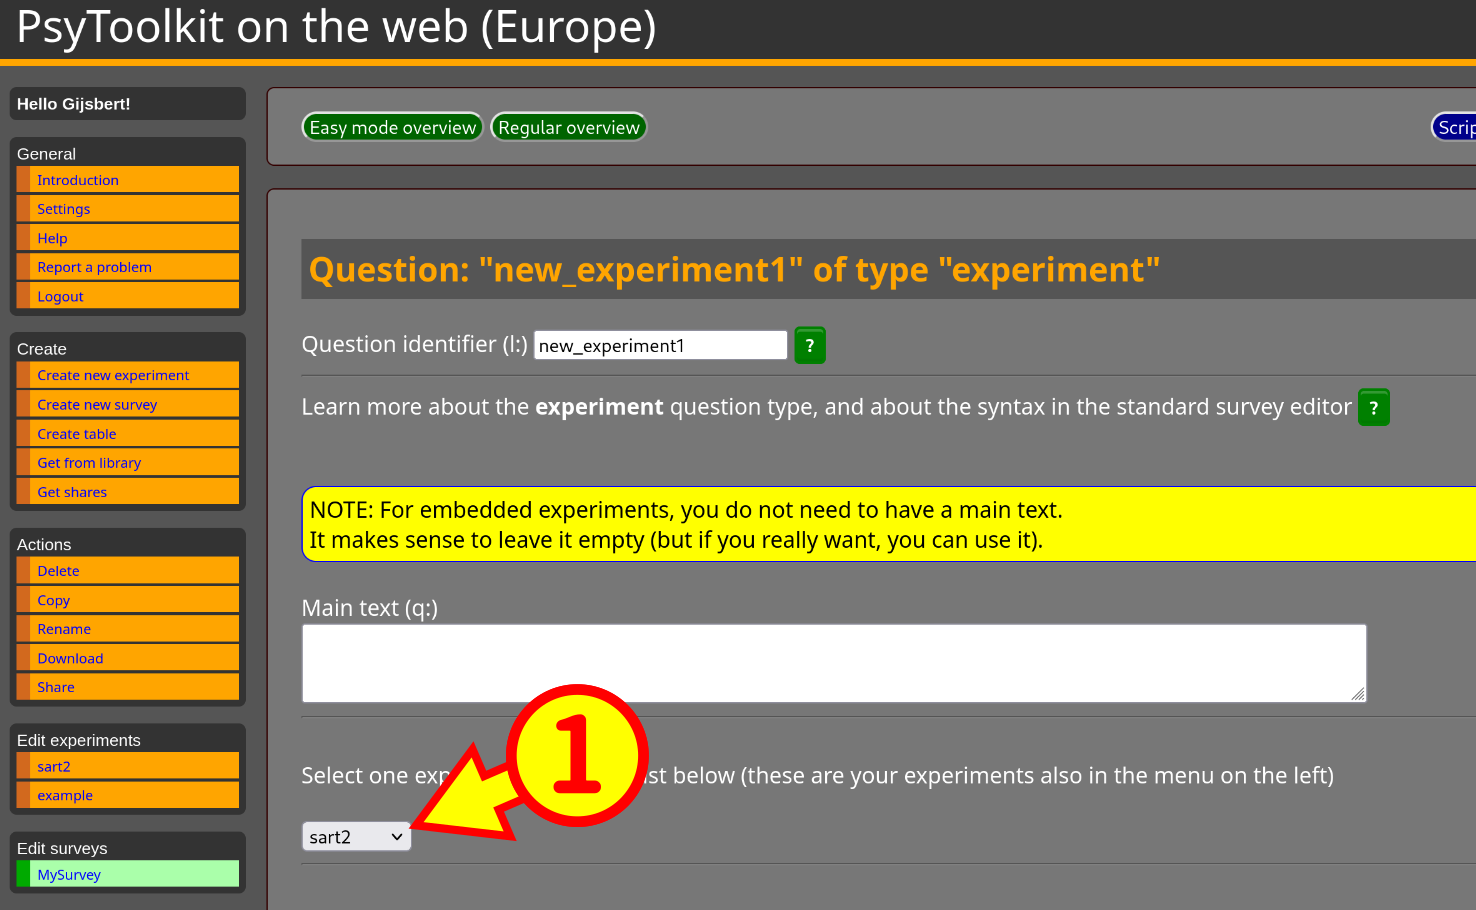
Now you are in the question editor for type "experiment". Here, you do not really to change anything. Just make sure that as you see below, the experiment selection dropdown points to the experiment you want, in our tutorial it is the "sart2". Also, at the bottom, click "save" which brings you back to the overview of all the questions you have so far in your survey.
STEP 9
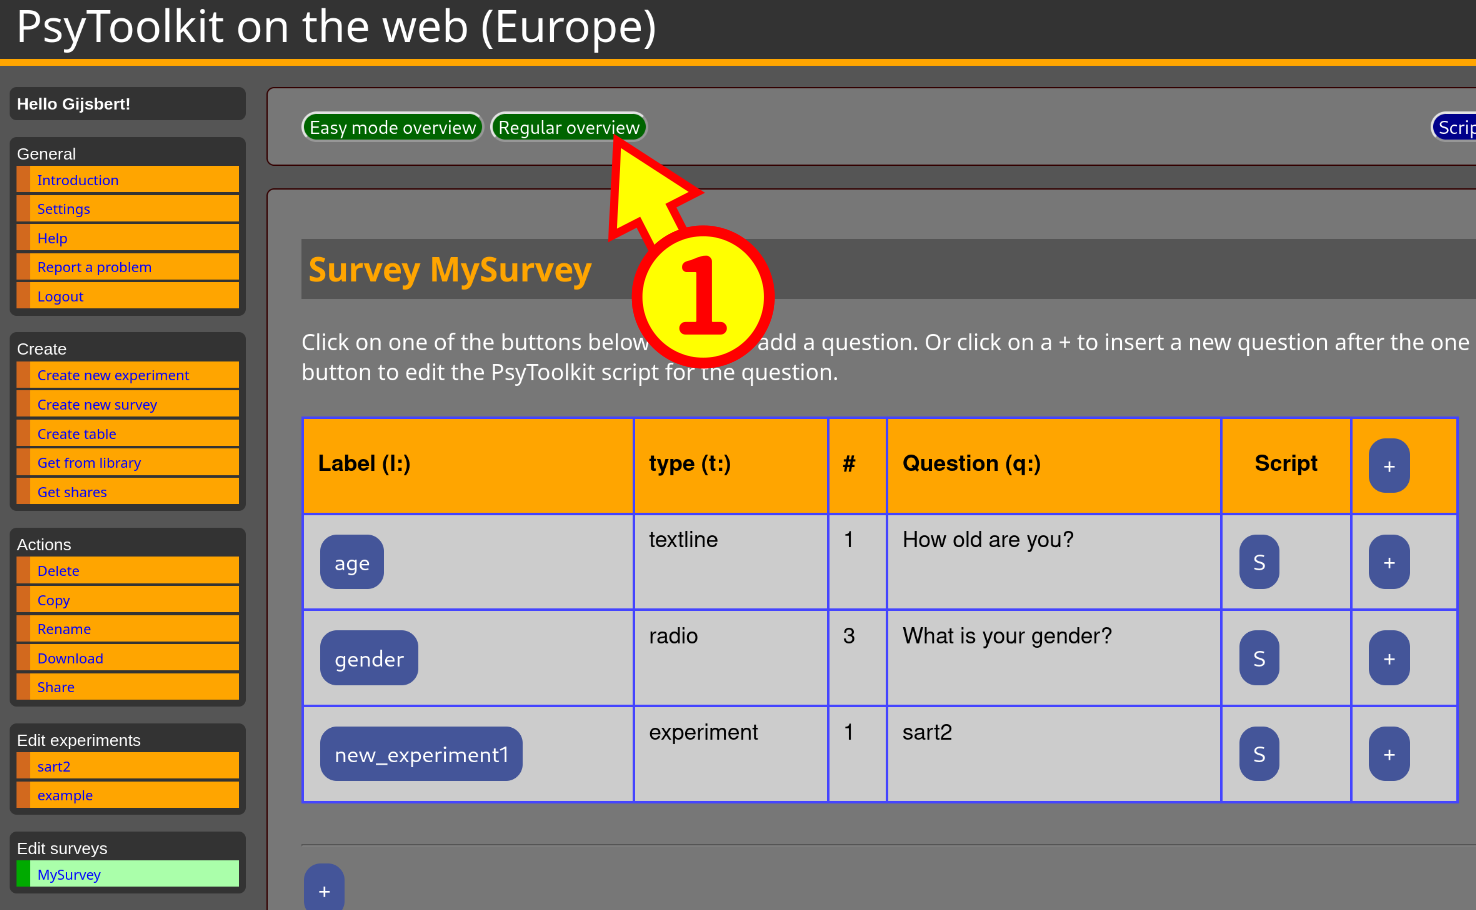
Now at the overview of your questions, at the top, click on the green button "Regular overview" again. You are almost ready.
STEP 10
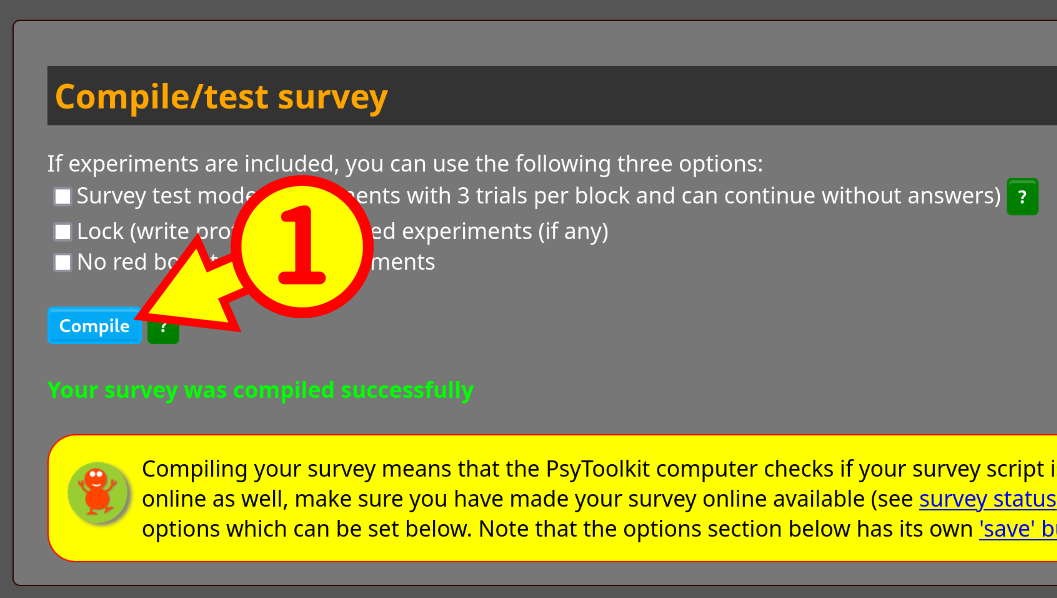
Now you are in the regular survey editor. Now you need to "compile" it. This means make it ready for showing to partcipants with all the information you just entered included.
Click "Compile" the survey button. It should say "Your survey was compile successfully".
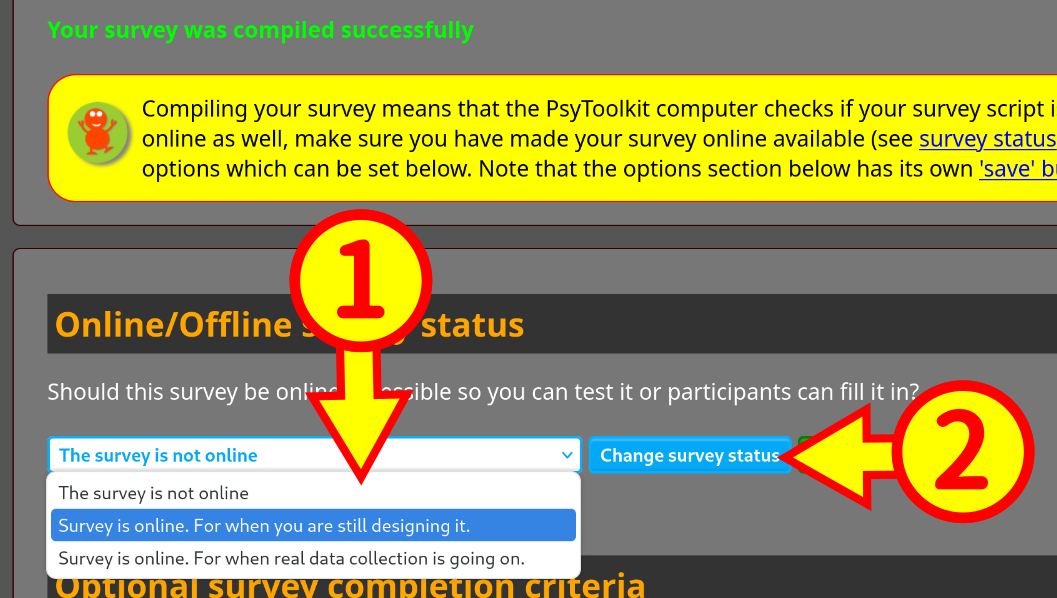
STEP 11
Now make your survey online available. You only need to do this one time in new surveys. You scroll down a bit and select "Survey is online" and confirm with clicking the button next to it "Change survey status"
Now basically your survey is ready, but it lacks the polish it needs.
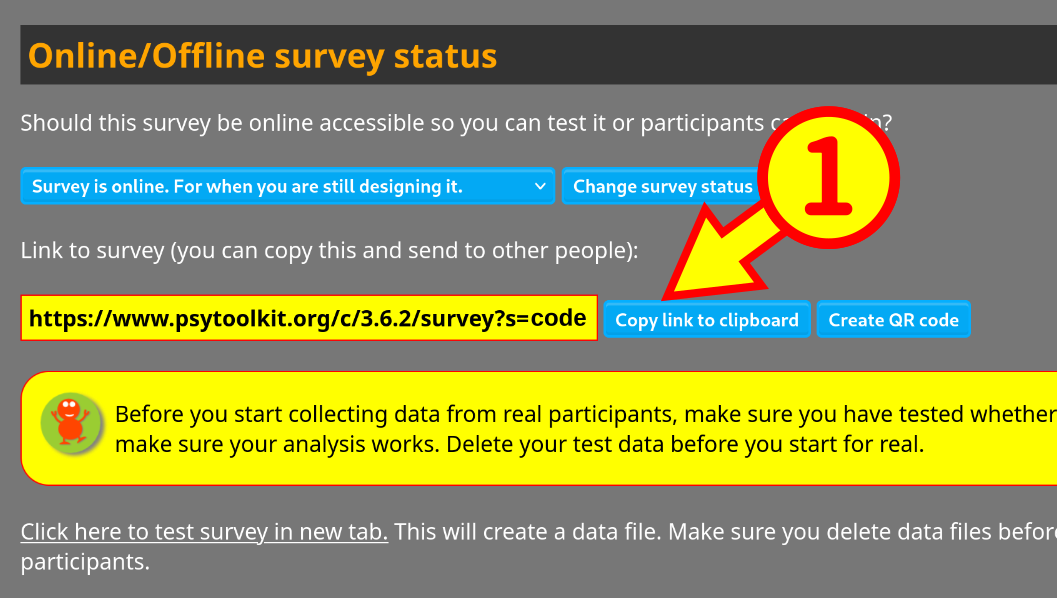
STEP 12
You basically now can send out your survey to participants. If you scroll down a bit, there is a link "Copy link to clipboard". If you use this, you can send this link in emails. Or you can click to create the QR code and hang that up on posters around your university.
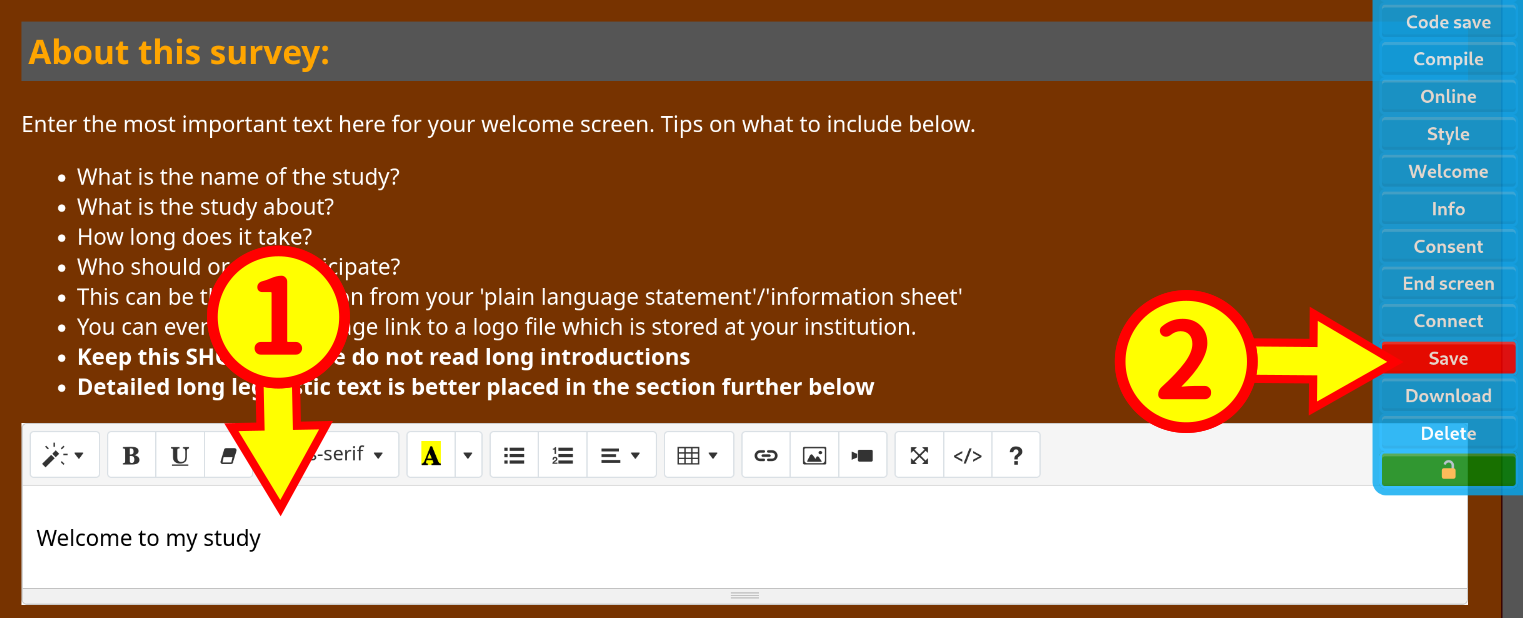
STEP 13
In order to select all the functionality you want, you can scroll through the page, add information for the welcome page, and so on. Once happy, "save" that information (click save in blue menu) and recompile.
STEP 14
It is always worth testing your survey before sending it out. Before you send it out, make sure to delete your test data, that is quite easy to do:
-
Go to "Download section" and click "Prepare data for download"
-
Refresh page if "Download data in zip file" does not show up
-
Then "Download data in zip file"
-
Now you go to delete and select "Delete particicipant data files"
-
Now your survey has no more data

STEP 15
Congratulations, you are now completely done. In summary:
-
You have embedded your experiment in the survey
-
You have added information in the welcome screen and so on
-
You have a link for your survey that you can send out
-
You have deleted all your test data so that all data collected from now are for your final analysis
One way to work is to make a nice poster and put the QR code on it and hand it out to people on campus.
